Photographing Birds in Flight

Photographing Birds in Flight

The thing about birds is that they rarely sit still just to make it easy for you to photograph them. Sometimes you’re lucky and they’ll stay put long enough, but more often then not they will take to the air as soon as you approach.
Some people get irritated by this, but for me the chance to capture them in flight adds an extra dimension. The challenge of photographing birds in flight and coming to grips with the techniques necessary to do it well is a sure fire way to significantly improve your overall photographic skills.

So, whether you set out specifically to photograph birds in flight (commonly abbreviated to BIF), want to be prepared for the moment when your stationary subject becomes airborne or just want to be able to capture the occasional fly past, a few tips wouldn’t go amiss.

Most of the suggestions made here about planning will apply more to a sortie with the primary goal of photographing birds in flight, but can be equally relevant to capturing an opportunity that presents itself.

Planning

As with most endeavours, some time spent planning before you set out rarely goes amiss. Here are a few things to consider.

Timing
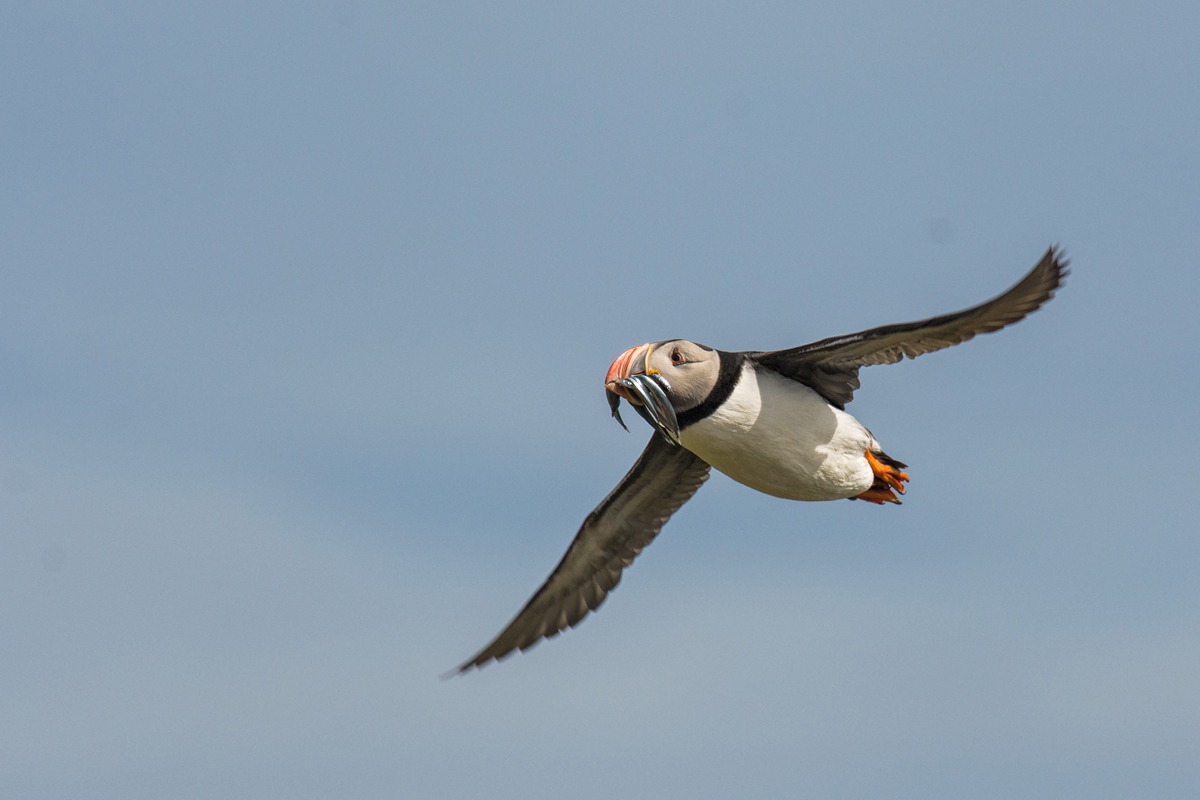
It makes sense to choose the time of day when you will have the best light; this almost always means the morning or the evening – the golden hours when the sun is lower in the sky.
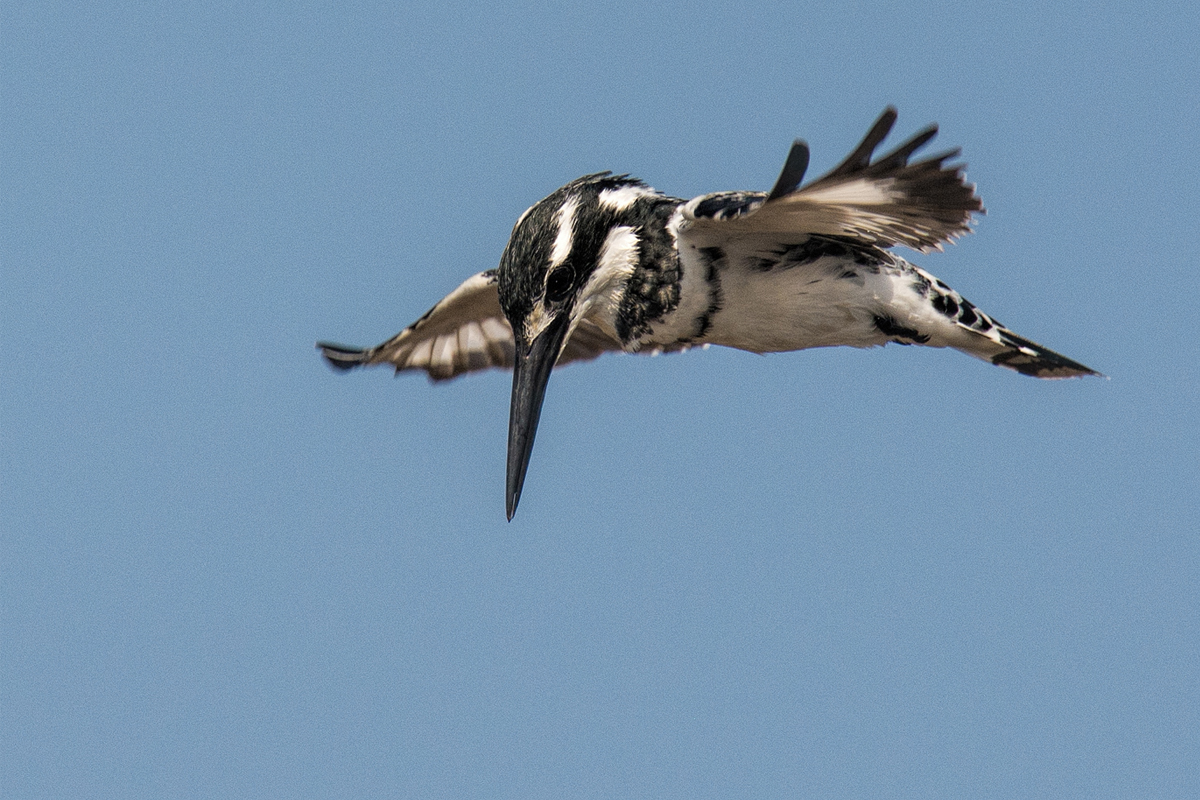
Get there early and stay late. Not only will your birds have a nice glow but the low sun will produce a nice reflection in the birds eye, which could otherwise just be a black space.

Location
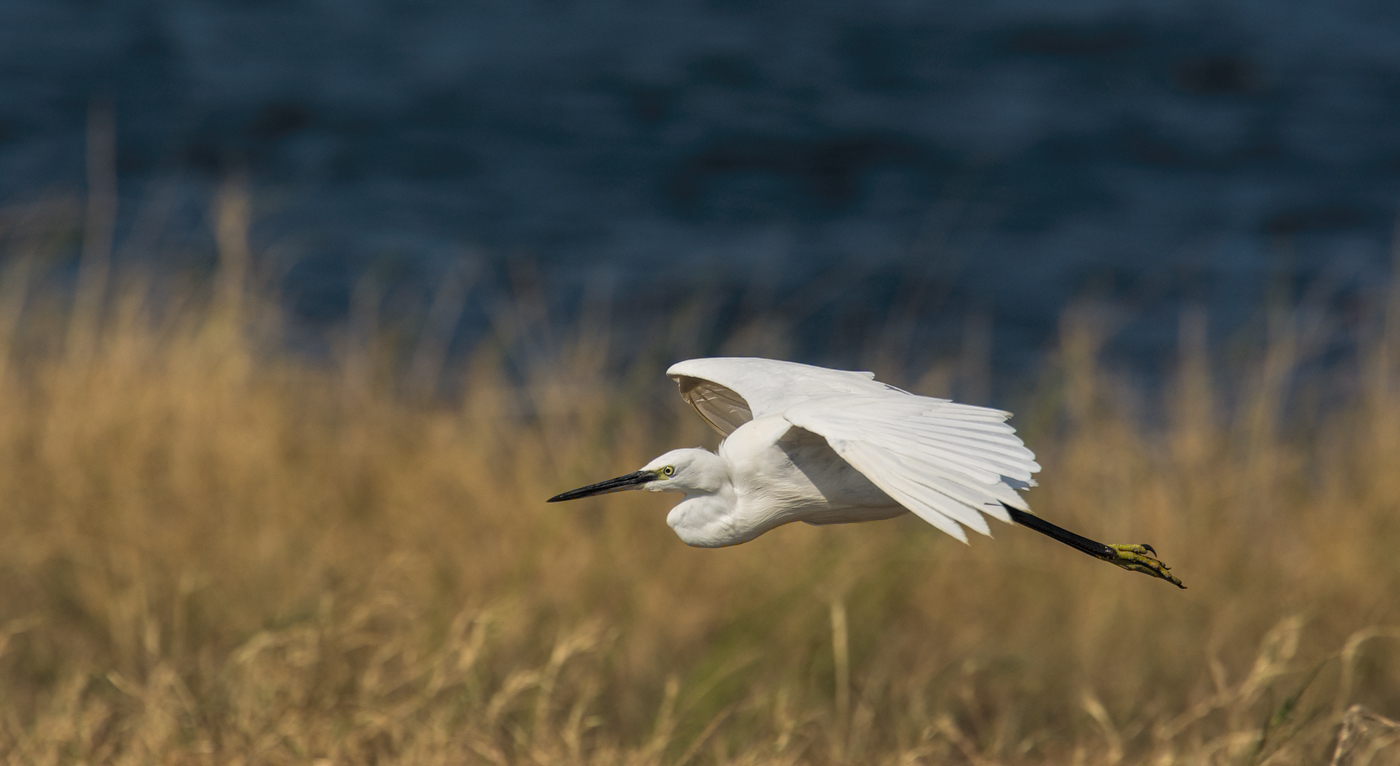
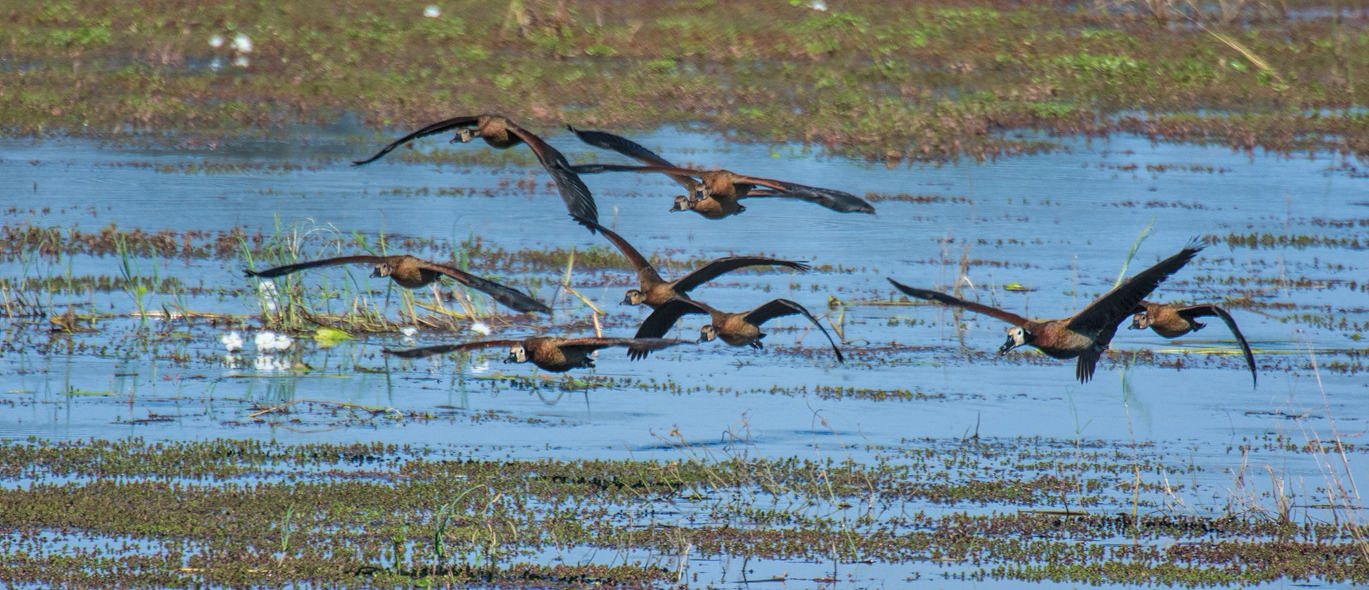
Locations near rivers or lakes are great because of the abundant food sources for the birds, but other feeding, nesting or roosting sites can be equally rewarding.
With sites of this type you will give yourself opportunities to capture birds arriving and departing; not just in flight but also at take off and landing.

Positioning
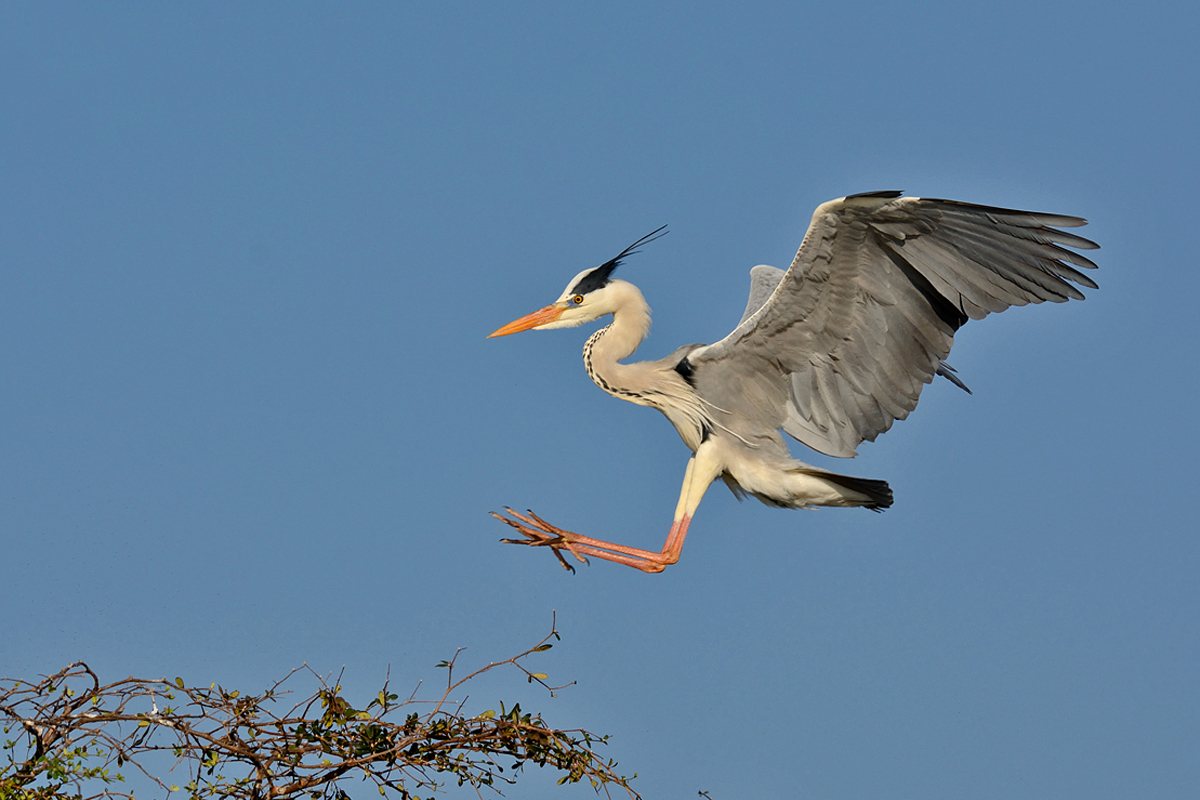
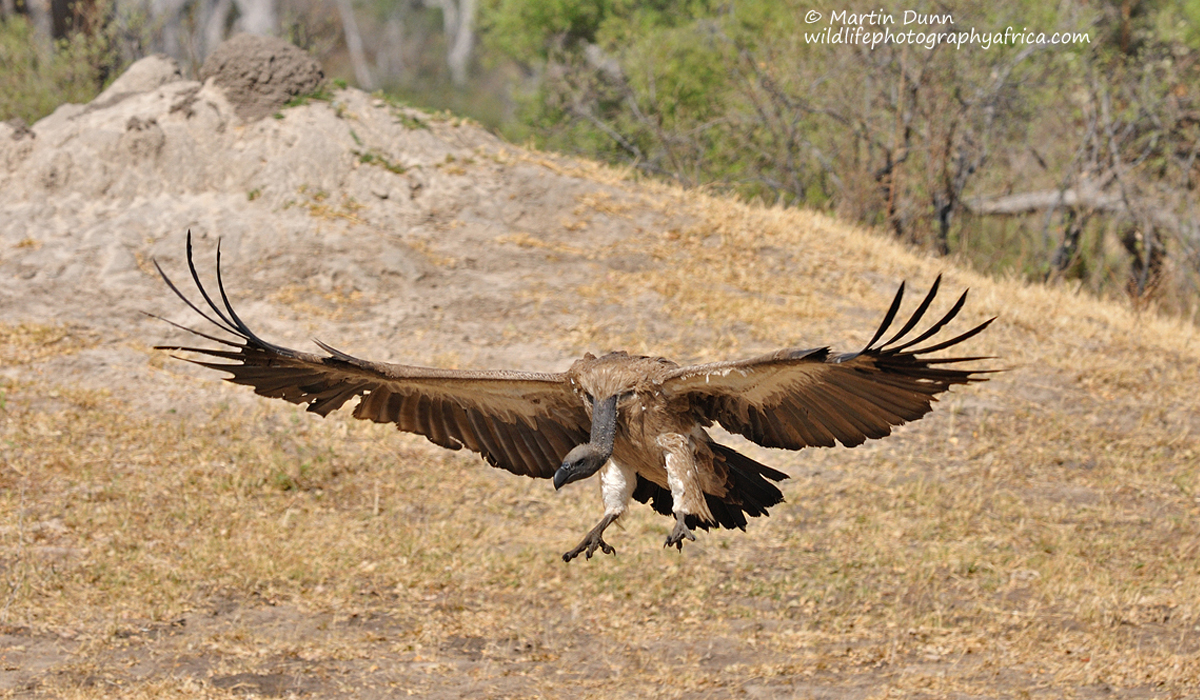
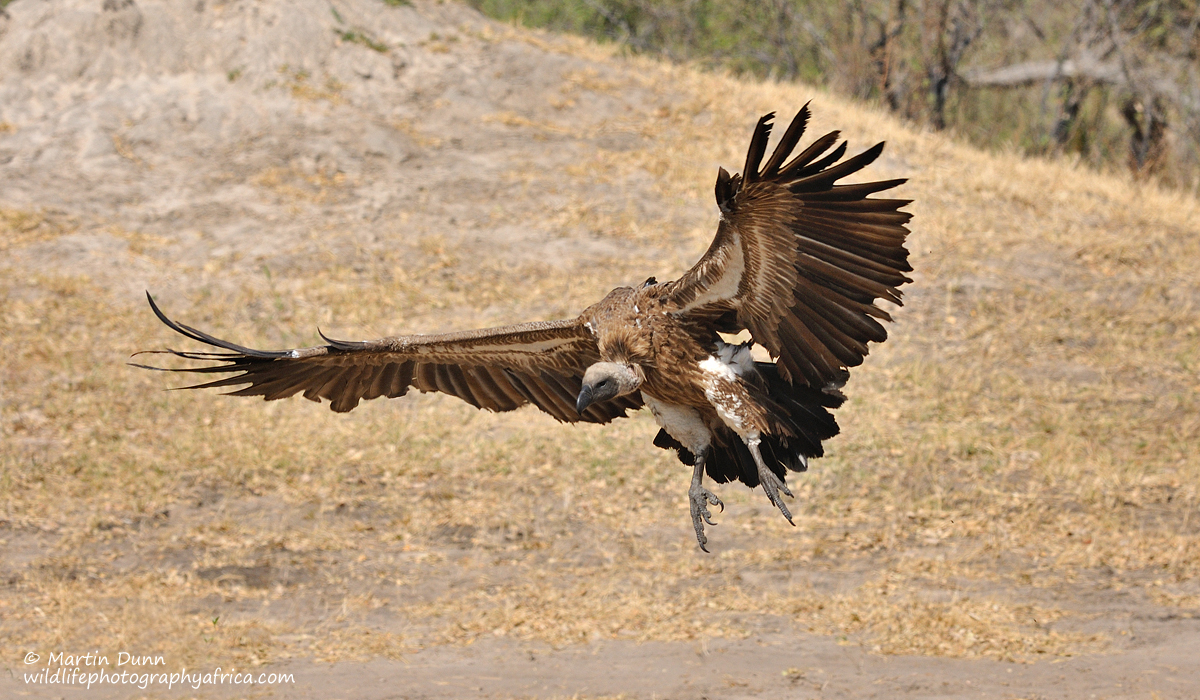
If possible, pick a spot that will put you at eye level with your subjects. BIF photos generally look best when the photographer is at the same height as the subject. Failing that, try and find an elevated position; better to be a little above your subject than below it.
Next, check the position of the sun. Ideally you want the sun behind you or slightly to the left or right of your position. This will ensure that you get good lighting on your subject.
Except for very specific reasons, avoid shooting into the sun; if there is too much light behind the subject it will appear as a dark shape in your photograph and you’ll struggle to recover any detail.
Take account of the wind; birds, especially large birds, will usually take off and land into the wind. Being aware of the wind direction will help you predict the direction they’ll be flying in. (This rule is often over ruled by Murphy’s Law; the one that dictates that birds will always fly away from you when they take off.)

Know your subject
This is something worth doing no matter what you are photographing.
Study their habits; if you are photographing birds that are nesting/roosting learn which direction they arrive at and depart from the nest/roost. Some birds fly straight, others will drop down or dive when leaving the nest. Some birds will have a perch they regularly use on their approach to the nest.
Songbirds often have a favourite perch from which to sing; take a little time to try and find it.

If your subject is one that has a particular characteristic, like swooping down or skimming, then be ready for it. Try to put yourself in a position where you can keep photographing until the bird has completed its manoeuvre. Much better to photograph it coming towards you and finishing up level with your position than to start with it level and then only being able to photograph it flying away from you.

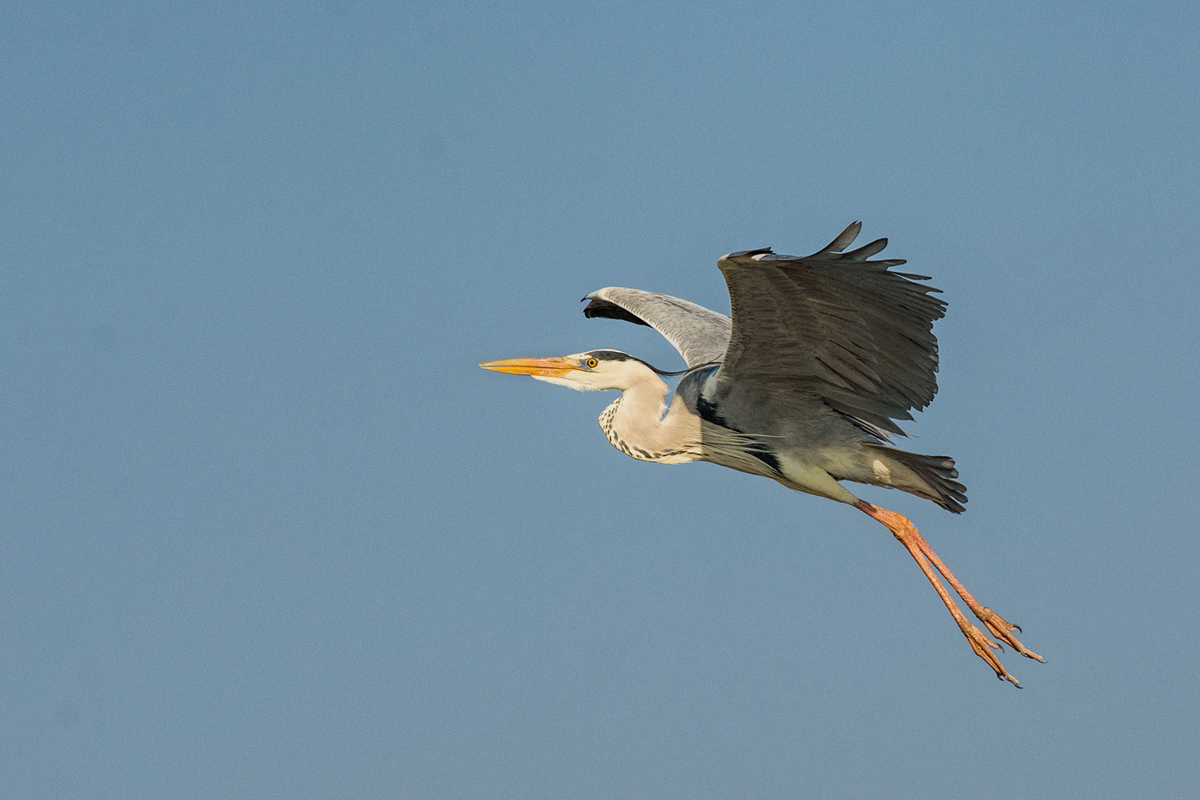
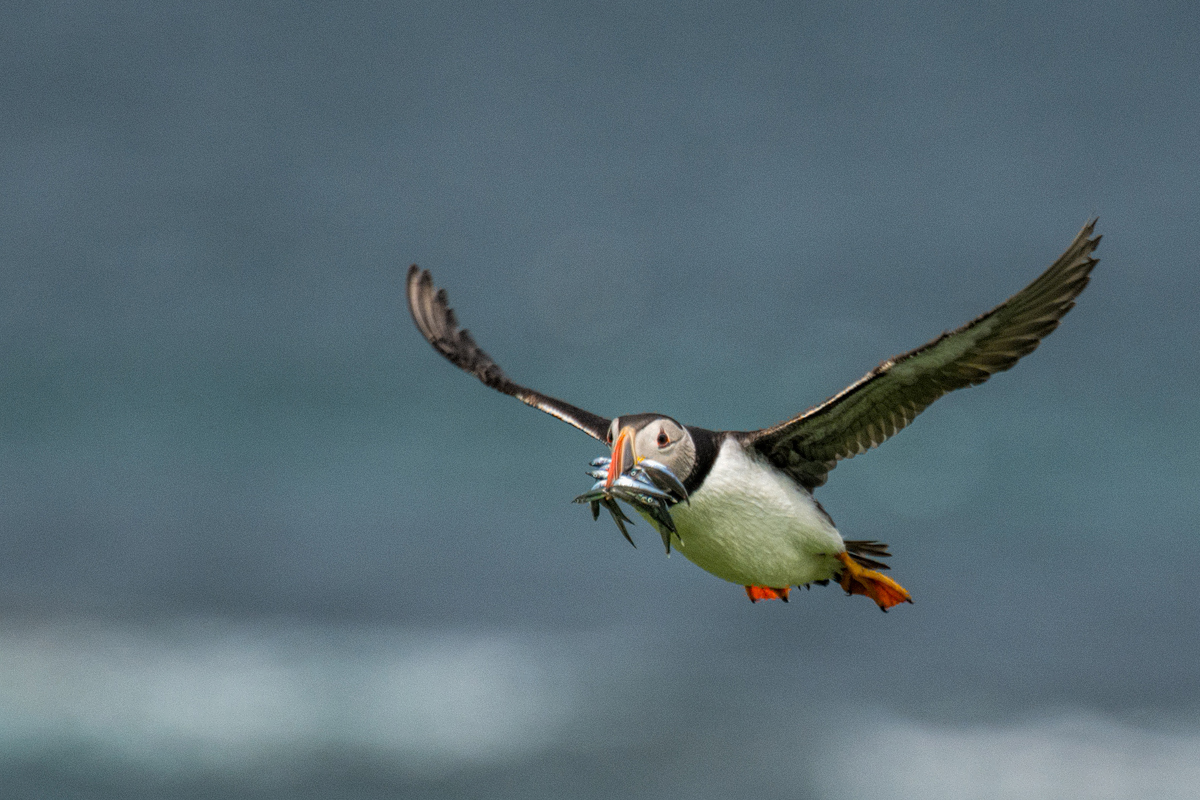
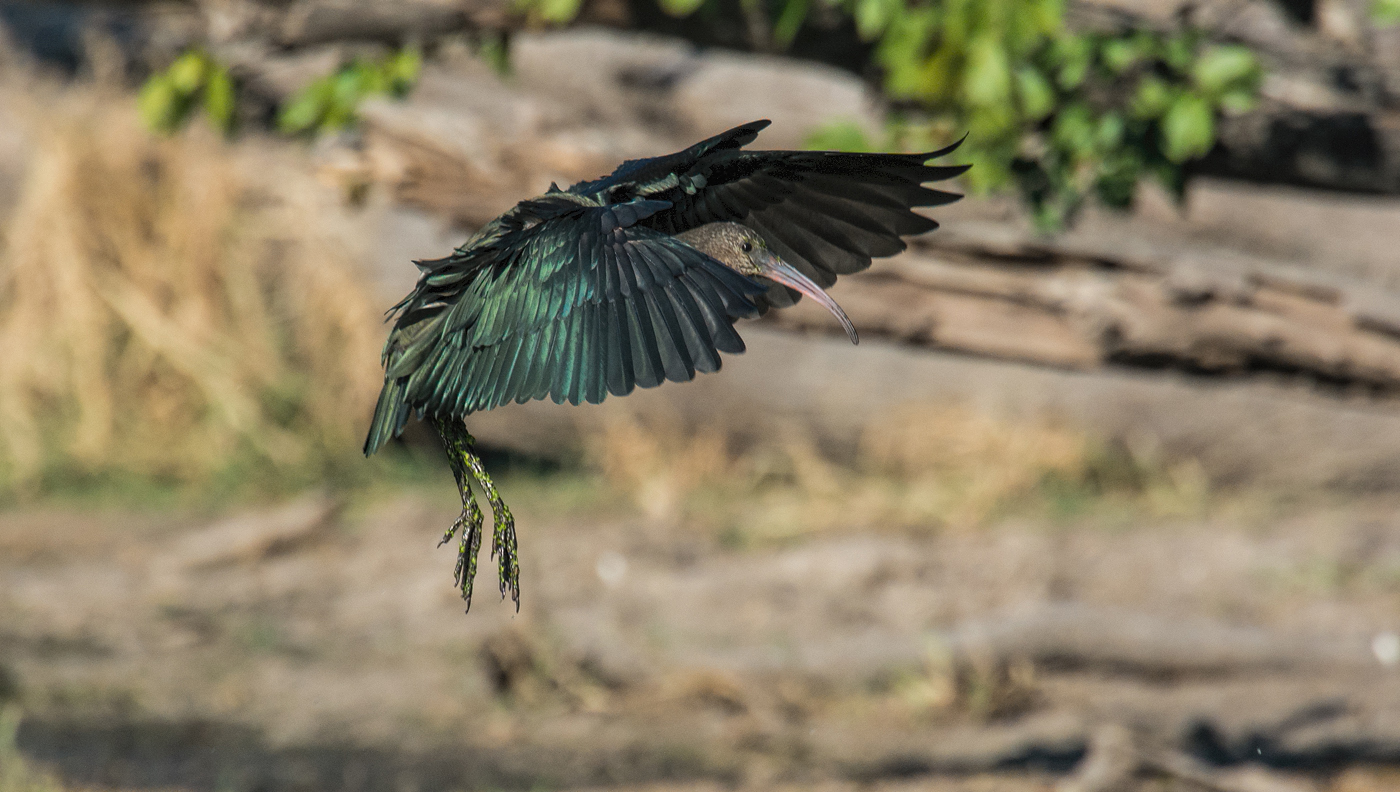
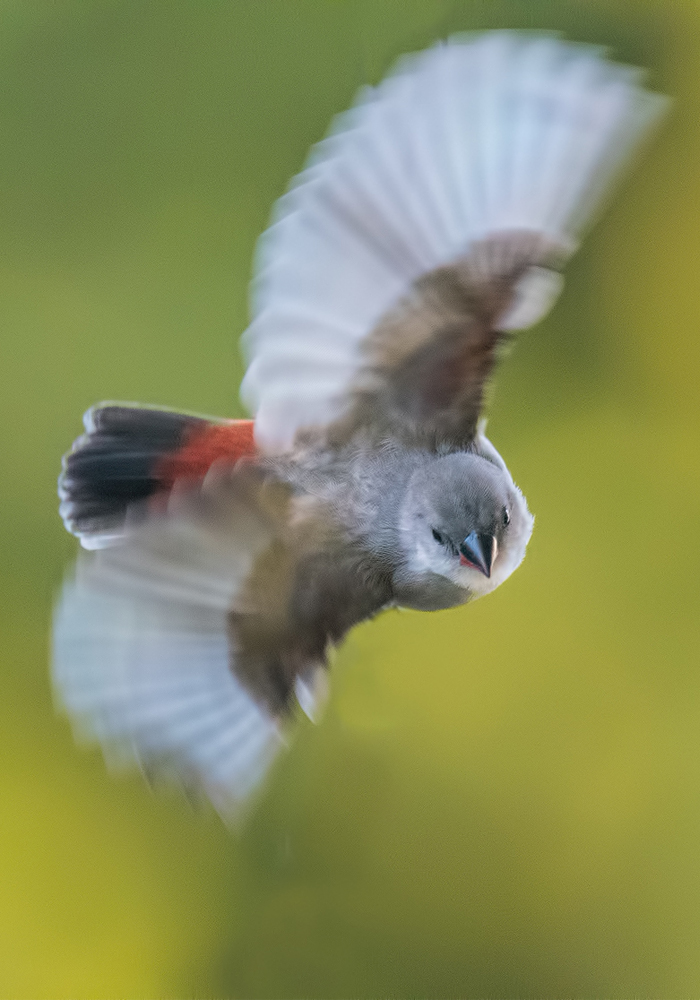
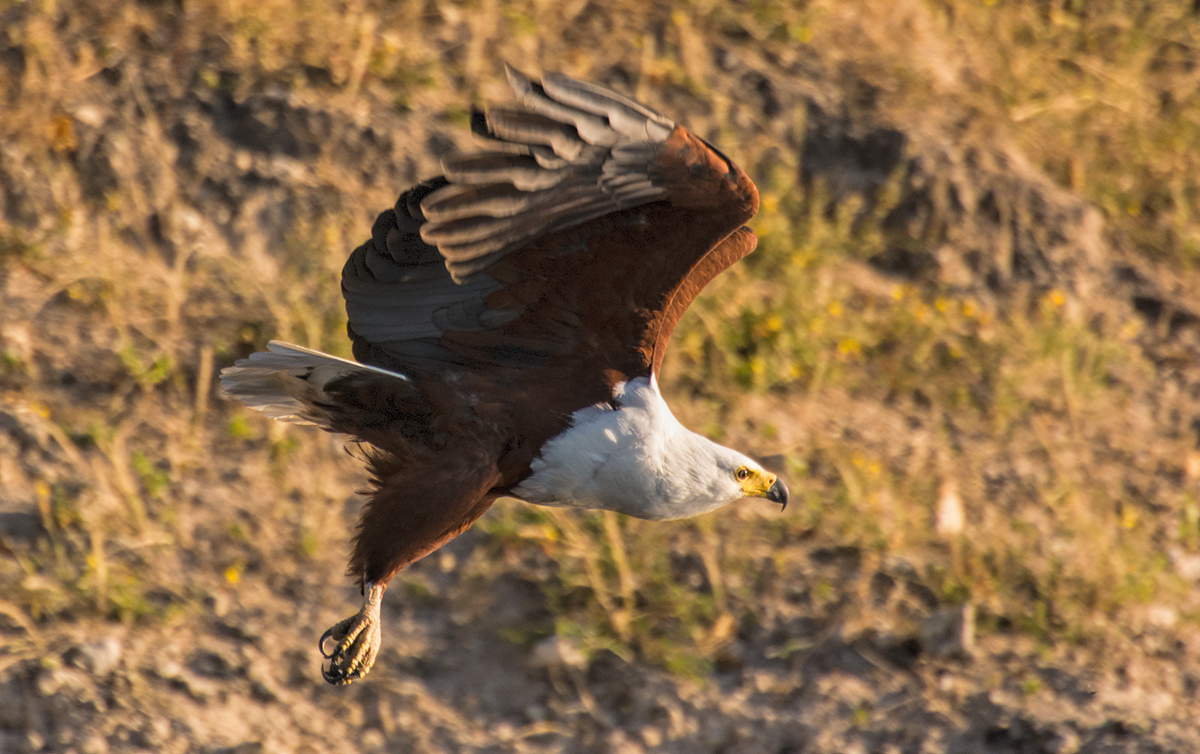
Not all birds fly in the same way. Small birds tend to flap their wings very rapidly and are more erratic in their flight whereas large birds like buzzards and eagles flap their wings much more slowly and will use thermals to hover and glide; making their flight path much easier to follow. Some birds, like Bee Eaters and Swallows will return to the same perch after each sortie; you just need to be patient.

Background
It is not always possible to achieve, but a clean background is much better than a messy one. Your BIF will look much better against clear sky than it will against a tangle of bushes or branches. It is also much easier to achieve focus if there is less to distract your camera’s sensor.

Equipment

This is not an article about choosing equipment so I’ll just skim over the basics.

Up until very recently I would have said that to get good photographs of birds in flight you need to use either a DSLR or mirrorless camera with interchangeable lenses. Although bridge cameras have evolved to the point where they are excellent for wildlife photography, in most cases their autofocus does not react quickly enough for good BIF photography.
This situation is changing rapidly though and there are now bridge cameras that have amazingly fast autofocus systems. The trick with these is to have decided on your focal length before you start tracking your subject. Adjusting your focal length at the same time as your camera is trying to focus on a moving subject significantly reduces your chances of success.

For the purposes of this article though, the tips given are based on using a DSLR.

A DSLR then; you’ll need a body and a lens. Ideally you will want a camera that can shoot several images per second in burst mode.
You will also need a telephoto or zoom lens. The size of that lens will depend on the size of your subject and how close you think you’ll be able to get to it.

If you are not able to get close, then you might need something longer, a 500mm or 600mm focal length perhaps, if you can get reasonably close, then a 300mm focal length is perfectly adequate.
An important thing to remember here is that when you are tracking a BIF you need to leave a bit of space around your subject. If you zoom right in to a bird so that it fills your viewfinder you will discover that as soon as it spreads it wings to takes off it has broken out of your frame. If you are framing a bird to photograph it in flight, leave plenty of room for it to fly into.

Whether you use a prime (fixed telephoto) lens or a zoom lens is entirely up to you. A zoom lens will certainly give you flexibility and allow you to adjust the focal length according to your needs. However I find that a prime lens tends to focus the mind better because it takes away one variable and instead of wasting time zooming in & out to find the focal length that works best, you can concentrate on the subject.

Tripod?
A tripod is certainly valuable for many kinds of wildlife photography but BIF is possibly one area where it is more of a hindrance than a help. Even with the versatility of a gimbal or ball head it is hard to follow a subject that starts in front of you and ends up behind you, or one that flies over your head. However, if your subjects are coming & going from a nest or feeding site and all your photographs will be taken within a limited field of view, then a tripod most definitely helps. Apart from anything else it means you don’t have to keep holding the weight of your camera all the time.

Burst Mode
Most DSLR & mirrorless cameras have a ‘continuous exposure’ or ‘burst’ mode. This allows the camera to keep taking photographs for as long as your finger is on the shutter release, or until the camera’s buffer is full; whichever comes first.
You should set your camera to this mode for shooting birds in flight.

Exposure

It is well worth taking a bit of time before you start shooting in earnest to prepare your exposure.
Some of the things you’ll need to consider:

Shutter speed – You need the shutter speed to be fast enough to “freeze” the bird in flight. So the question is, how fast should you set your shutter speed to freeze the wing motion? I’d recommend that you go for at least 1/1000th of a second to 1/2000th of a second.

Aperture – To gain as much depth of field as possible I’d recommend using f8; this is usually the sweet spot on most lenses. You do need decent Depth of Field, especially for large birds that have a wide wingspan.

ISO – Whilst you want to keep your ISO as low as possible to avoid digital noise (graininess) in your photo, the ISO is the element of the exposure triangle that you should sacrifice when necessary.

Since a fast shutter speed is so important, some people will advocate setting your camera to Shutter Priority, fixing the shutter speed you want and then letting the camera select the best aperture and/or ISO.
Others will recommend using the Manual setting and fixing all the variables; this is a good method if you have confidence in your ability to monitor and manage this during your photo shoot.

So how should you reconcile these three elements to find the best exposure?
Here are two tried and tested methods; they are almost the same but in each instance you are leaving a different part of your exposure triangle as the variable.

Method 1

  1. Set your camera on Aperture Priority
  2. Set your aperture to f/8, for the reasons given above.
  3. Using your camera’s light meter, check the exposures in the place where you plan to take your photographs. There will be lighter and darker areas.
  4. Adjust your ISO to alter your exposure until the shutter speed set by the camera is at least 1/1000s (ideally 1/1200s or 1/1600s) when looking at the darkest areas. When your bird flies in the dark areas your exposure will have the aperture and shutter speed you desire and when it flies in a lighter area your shutter speed will increase.
  5. The last step is a bit of fine tuning. Not all birds are the same colour, so you will need to make some adjustment depending on whether your subject has light or dark plumage.

    It is worth noting here that it is a lot easier to recover detail from dark/shadow areas of a photograph than it is to recover detail from blown (seriously overexposed) highlights. So you should endeavour to ensure that any white plumage on your subject bird is not overexposed because your camera set the exposure for the darker parts.
    If you are photographing a white bird, or one with some white plumage you will need to use the exposure compensation (EV) on your camera to -1 or -2, effectively forcing the camera to underexpose. This might make other parts of the image a bit darker than you want, but you should be able to deal with that in post processing.
    Similarly, if you are photographing a bird with dark plumage you might want to overexpose a little to bring out a bit more detail, perhaps and EV adjustment of +0.3 or +0.7.

    Once you’ve got your settings in the right ball park it is well worth firing off a few test shots into areas of different light to make sure the results are in line with your expectations.


Method 2

  1. Set your camera on Manual
  2. Set your aperture to f/8, for the reasons given above
  3. Set your shutter speed to 1/1250s – or any other speed you prefer
  4. Take some readings with your camera to see what ISO the camera is selecting in the dark and light areas of your photograph. Make sure you are happy with the ISO for the dark areas, you may have to deal with some digital noise later on. When you shoot you will have both the aperture and shutter speed you desire and your camera will adjust the ISO to achieve a correct exposure.
  5. The last step is a bit of fine tuning (same as Method 1 above).
    Not all birds are the same colour, so you will need to make some adjustment depending on whether your subject has light or dark plumage.
    It is worth noting here that it is a lot easier to recover detail from dark/shadow areas of a photograph than it is to recover detail from blown (seriously overexposed) highlights. So you should endeavour to ensure that any white plumage on your subject bird is not overexposed because your camera set the exposure for the darker parts.
    If you are photographing a white bird, or one with some white plumage you will need to use the exposure compensation (EV) on your camera to -1 or -2, effectively forcing the camera to underexpose. This might make other parts of the image a bit darker than you want, but you should be able to deal with that in post processing.
    Similarly, if you are photographing a bird with dark plumage you might want to overexpose a little to bring out a bit more detail, perhaps and EV adjustment of +0.3 or +0.7.

Once you’ve got your settings in the right ball park it is well worth firing off a few test shots into areas of different light to make sure the results are in line with your expectations.

Focusing

Set your camera to continuous autofocus. This way it will keep re-focusing on the subject as it moves as long as you have the shutter button pressed halfway.

Composition

When photographing BIF composition can be difficult. Your main preoccupation is with keeping the subject in focus but you should not neglect composition.
With a bird in flight you will want to have more space in front of the bird than behind it – this is often referred to as space for it to fly into. The best way to try and maintain this space is (a) don’t zoom in too close, you can always crop your image later and (b) stay focused on the bird’s eye. If the bird’s eye is in the centre of your screen then there will be space in front of it.

Other bits & pieces

Try and take your photos with the bird flying towards you. Lock onto your subject as it approaches you, then pan with it as it flies past

Start shooting early and shoot in short bursts. If you wait until you think you have the perfect shot you’ll probably be too late.

Don’t be afraid to experiment. That’s the beauty of digital photography, you can take as many images as you wish and discard the ones that you don’t like.

Although in general we are always striving to get our images sharply focussed, there are times when a little bit of blur works very well. It can make the subject seem more real than a crisp image of a frozen moment.

Practice…you will get better.

Leave a Reply

Your email address will not be published. Required fields are marked *