Practice, Preparation, Position, Patience, Pizazz
Of course there are lot more than 5 great tips for improving your wildlife photography skills but if you can get a grip on these 5 you will be well on your way.
Practice
It really is that simple; practice.
The more you use your camera and lenses the more familiar you will become with them. You’ll learn what they can and cannot do; what the various numbers and LEDs in the viewfinder mean and how to make adjustments without taking your eye from the viewfinder.
The great thing about digital photography is that it gives us free rein to experiment. It’s not important what your subject matter is, you can always delete the pictures afterwards.
Take lots of pictures; play around with exposure, shutter speeds and depth of field. Over expose, under expose, try bracketing and different ISO settings.
If you can become familiar with what effect each adjustment will have on your final picture it will mean you can make the right decisions when you are in the field instead of fumbling around looking for the manual.
Preparation
This means a lot more than just making sure your camera battery is charged.
It means taking the trouble to learn a bit about your subject matter, its habitat and its behaviour.
Sometimes you are lucky and an animal will stay still long enough for you to fiddle around and get a decent shot. More often than not though, it will be moving.
Spend time watching animals and birds. After a while you’ll start to see patterns of behaviour being repeated. Birds will often have a favourite perch. They may fly off when you approach but if you are patient they will return.
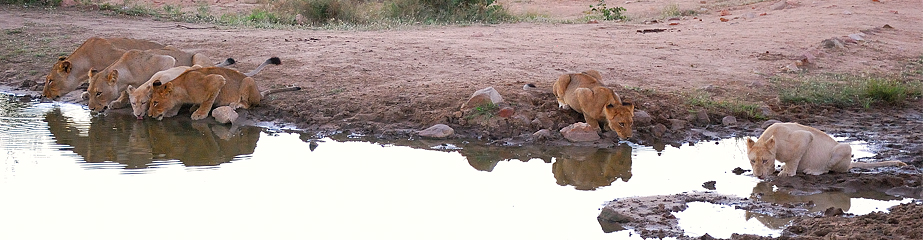
Lions sleep a lot, around 20 hours a day. Because they live in prides and do not have any natural predators to fear they will happily sleep out in the open. This means they can be quite easy to find. But sleeping lions are not the most exciting subject matter.
As the sun goes down and heat of the day begins to fade, the lions will become active. One of the most regular things they will do after their sleep is to find a drink. Once you know which direction they are moving; if you know where the nearest water is, you can often go on ahead and pick a position by the water to wait for them.
If you can learn to recognise from the way it moves what mode an animal is in then you can think ahead and plan your shot. Lions that are hunting have a very different posture from lions that are just ambling along. Learn to recognise the difference.
Position
Get yourself into the best position to get the shot you want. Think about the light; you’ll get a lot more colour and detail in your subject if the sun is behind you or to the side than you will shooting straight into the light.
This ties in closely with ‘Preparation’. If you know what your subject is likely to do then you can get yourself into position in advance. You’ll rarely get great shots following an animal around when all you can see is its backside.
Ideally get yourself into a position where the subject will come to you.
In some parks this is not possible due to restrictions about going off road but even then there is usually some scope for changing position.
Patience
This cannot be over emphasised; patience is essential, and inextricably linked to ‘Preparation’ and ‘Position’.
On a lot of game drives you will come across sights and events that are worth photographing; often by chance. You’ll find lions or cheetahs with a recent kill and quite happily settle down to watch and take photographs. And why not?
But what happens when you want to photograph a specific animal or bird and it doesn’t oblige by walking in front of your camera?
That’s when your preparation pays off. That’s when you pick your position and settle down to wait.
On a recent Timbavati safari I had been trying for 2 days to get decent photographs of buffalo. For some reason we always seemed to find them late in the day when the light was fading.
Then, on the third day, we found them almost immediately, moving through the bushes, a herd of about 100.
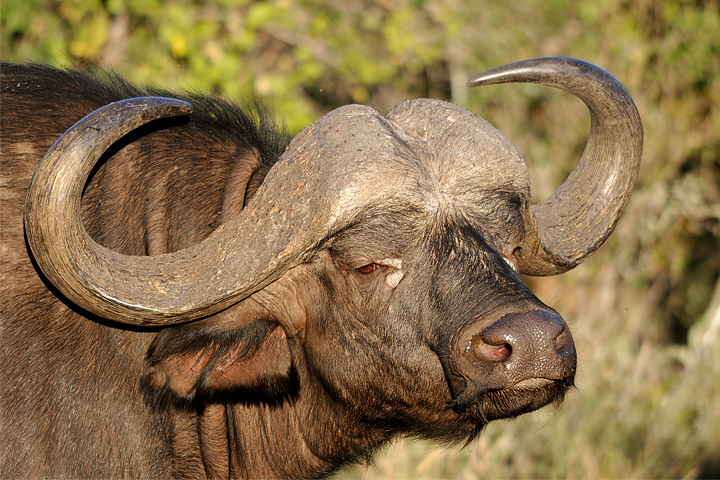
They weren’t just grazing they were moving with intent.
We decided that they must be heading to a waterhole, the question was which one. After a quick consultation with the guide we made our choice and drove straight to the waterhole.
There was no-one else there so we had the luxury of picking our position. Then we sat to wait.
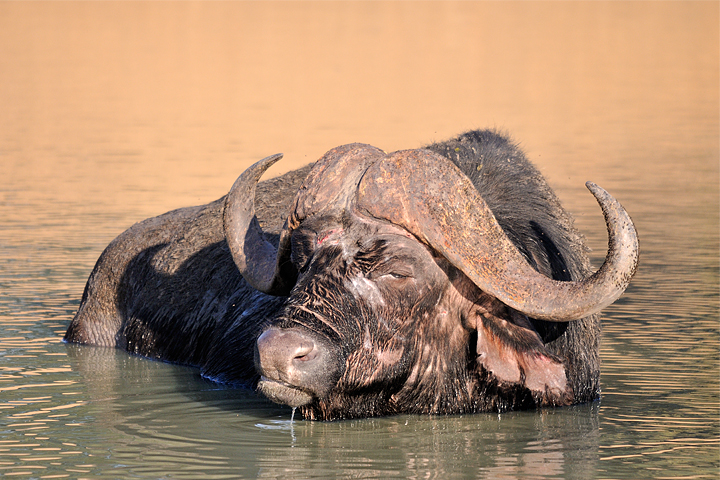
After about 20 minutes they began appearing from the bushes, heading straight for the muddy water.
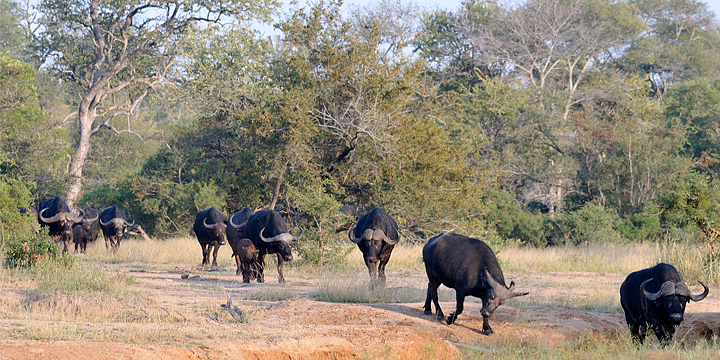
And I finally got the shot I wanted.
Pizazz
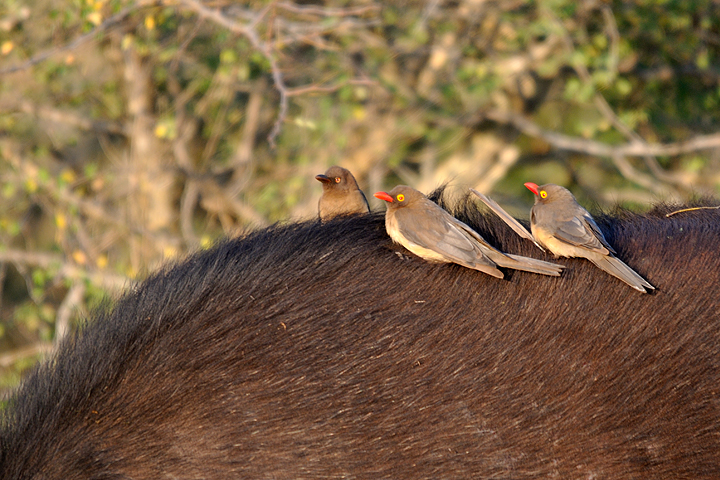
Give your photographs that special something that will set them apart from everyone else’s.
Sometimes you’ll be lucky enough to have choice wildlife sightings to yourself. But there will be lots of occasions where you’re vehicle is just one of many gathered around a leopard or a cheetah.
Everyone is taking photographs and they are all taking photographs of the same subject.
If you want your photographs to stand out, even from those taken by others in your own group, you need to break the mould.
Think about how you can place the subject in your frame to create a different image. Most photography courses will tell you there are rules about composition (the rule of thirds for example) but it’s best to think of them as guidelines rather than rules. Or, if you prefer, you can go back to the age old saying; ‘rules are made to be broken’. The only thing that matters is the end result. If your final image is breath-taking, no-one is going to quibble about whether or not you followed the rules.
Think about whether you want your main subject to fill the frame or whether you want to portray it in some kind of context. Even though you may have a lens that will allow you to zoom right in to the subject, it may look better taking up less of the frame.
Where others come in close you may decide that a wider shot gives a better result.